The Notifications Settings Screen
Navigation
Access via: Account Settings → Notifications
Overview
The Notifications screen is where you decide which events SellerLegend tells you about, for which of your accounts, and where each alert is delivered. Your settings are organised as rules. Each rule combines:
- a trigger -- the event to watch for, such as a lost Buy Box or a suppressed listing,
- the accounts it applies to -- one or many of your connected marketplace accounts, and
- the destinations -- where the alert goes: in SellerLegend, by email, to Seller Central, to Zapier or to a webhook.
The screen has two tabs: Rules and Destinations.
Upgraded from the old settings grid?
Earlier versions of this screen showed a grid with one row per notification type for every account. That grid has been replaced by rules, and your existing settings were turned into rules automatically, with no change to what you receive. See the Notification Rules release note for details.
The Rules Tab
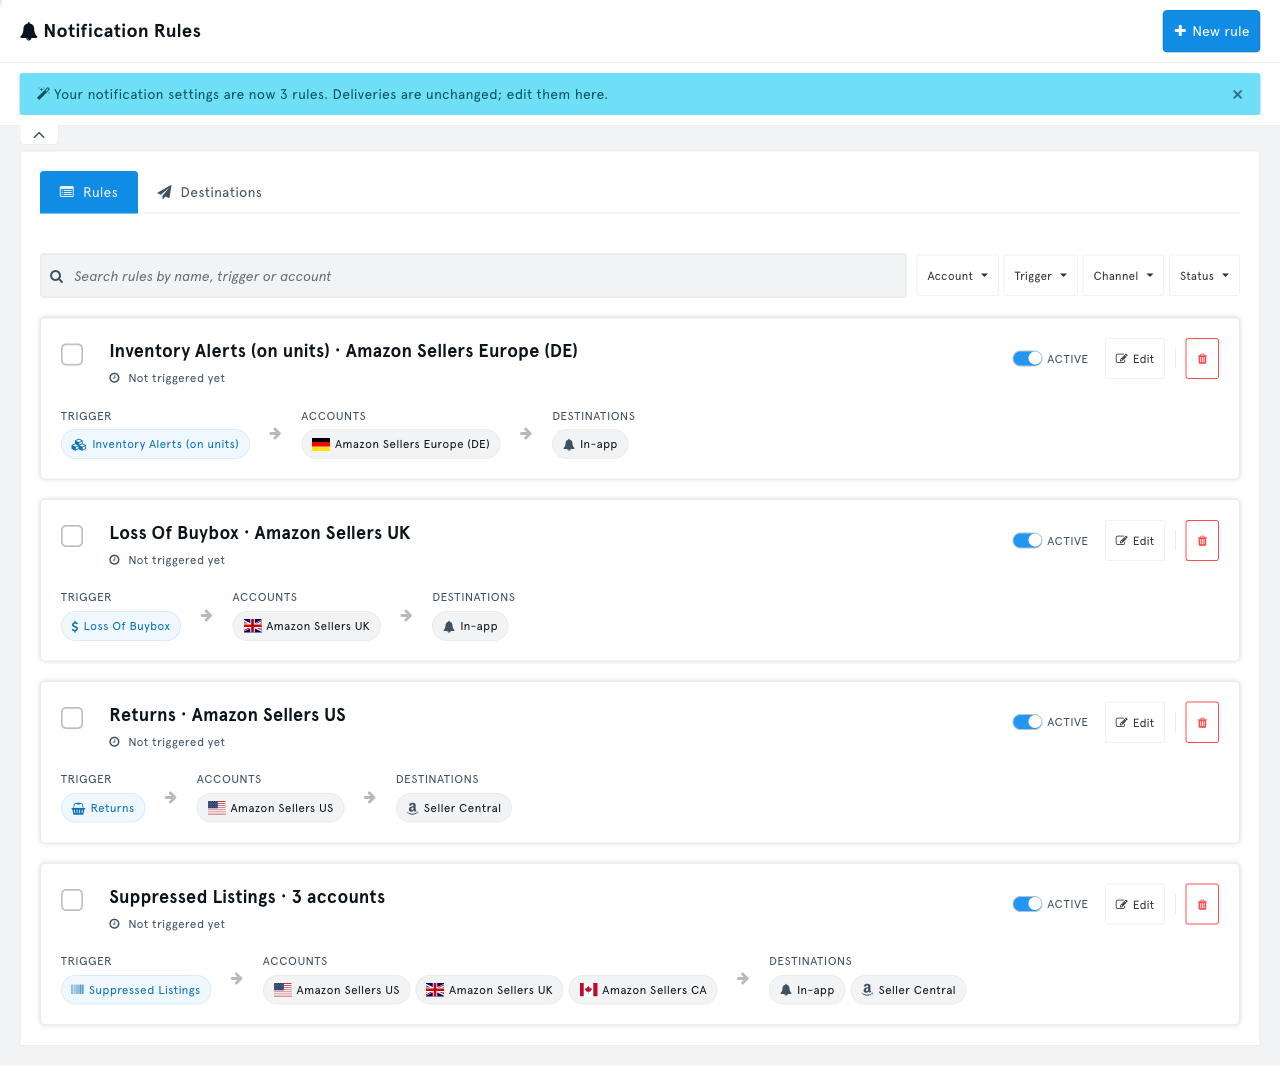
Each rule is shown as a card with its name, trigger, accounts, channels, status (Active or Paused) and when it last fired.
- New rule -- opens the setup wizard (see below).
- Status switch -- pause a rule to stop its alerts without losing its setup, or resume it.
- Edit -- reopens the wizard with the rule's current settings.
- Delete -- removes the rule and stops its alerts.
Search and Filters
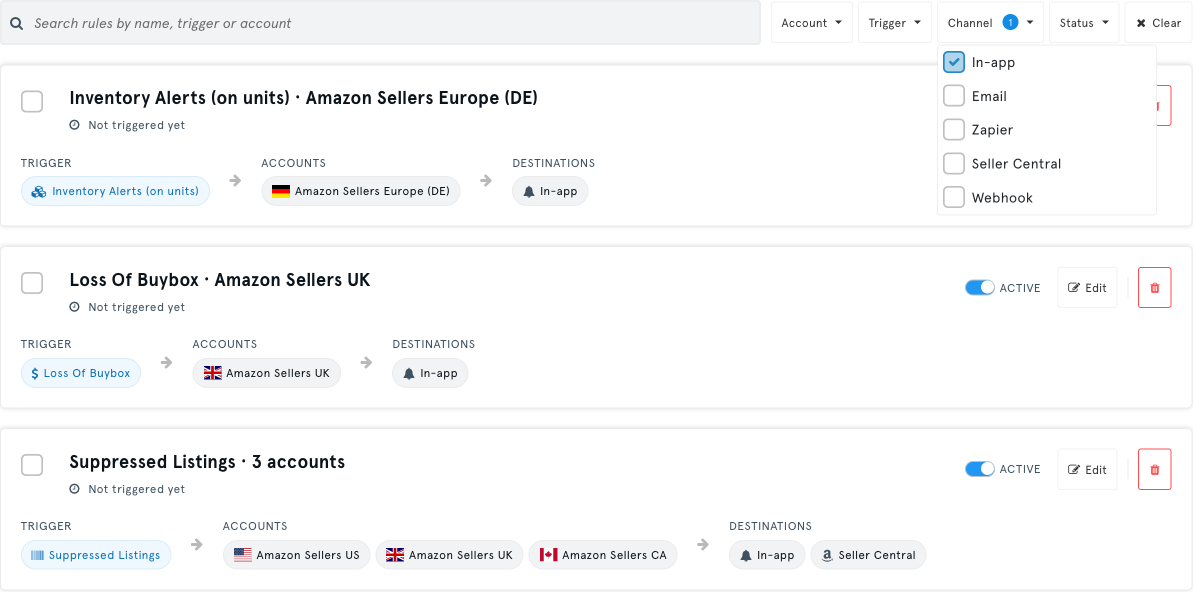
- Search rules by name, trigger or account.
- Narrow the list with the Account, Trigger, Channel and Status filters. Click Clear to reset them.
Bulk Actions
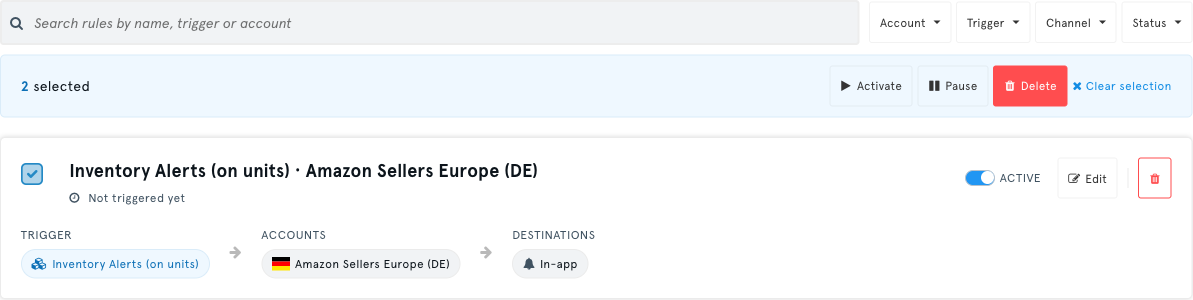
Tick the checkbox on one or more rule cards. A bar appears with Activate, Pause and Delete, which apply to every selected rule after you confirm.
Creating a Rule
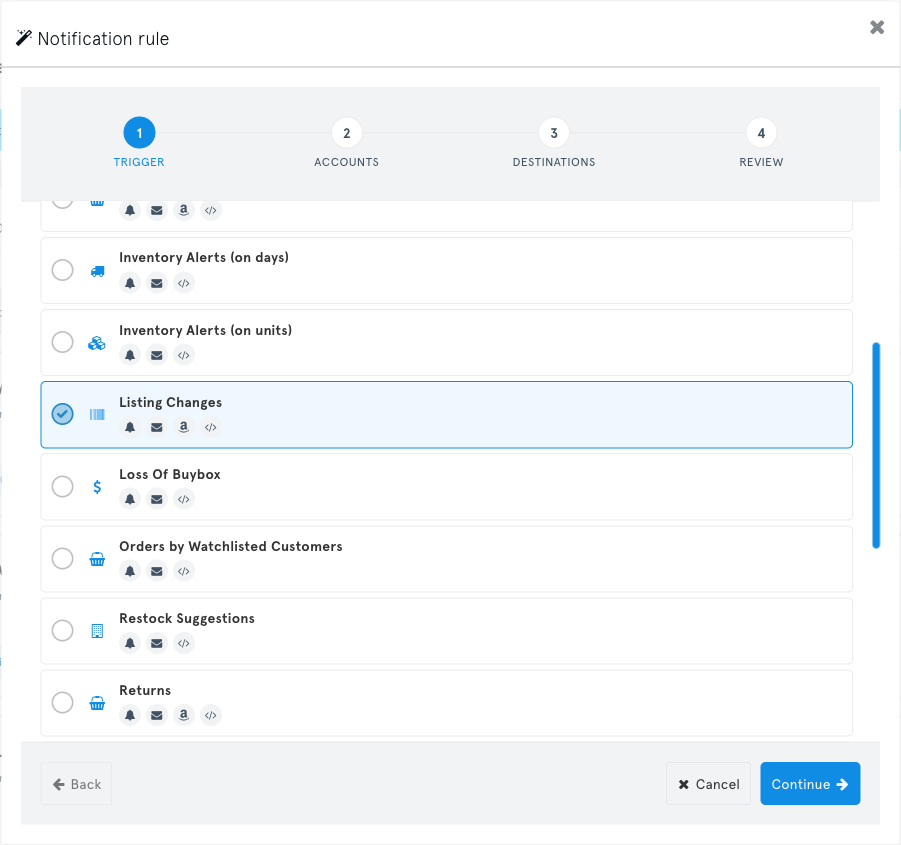
Click New rule and follow the four steps.
Trigger -- pick the event this rule watches for. Search the list by name. The icons under each trigger show which channels it supports.
Accounts -- pick one or more connected marketplace accounts, or use Select all. Account-wide triggers (Import Report, Export Report, Export Report Failure, Amazon Connections Failure) are not tied to a marketplace, so this step is skipped for them.
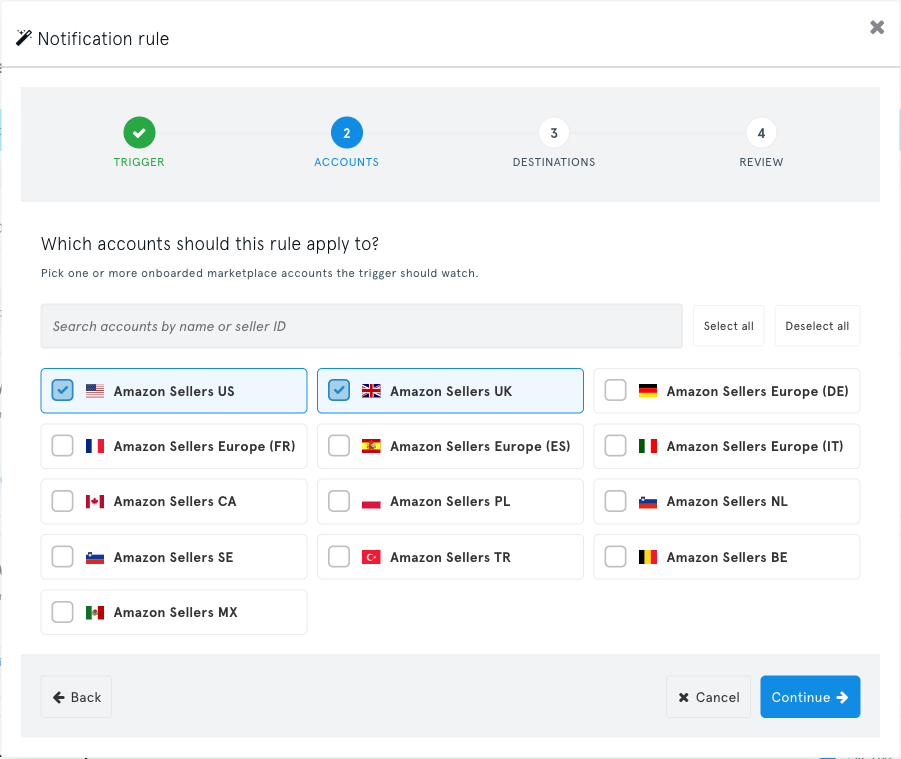
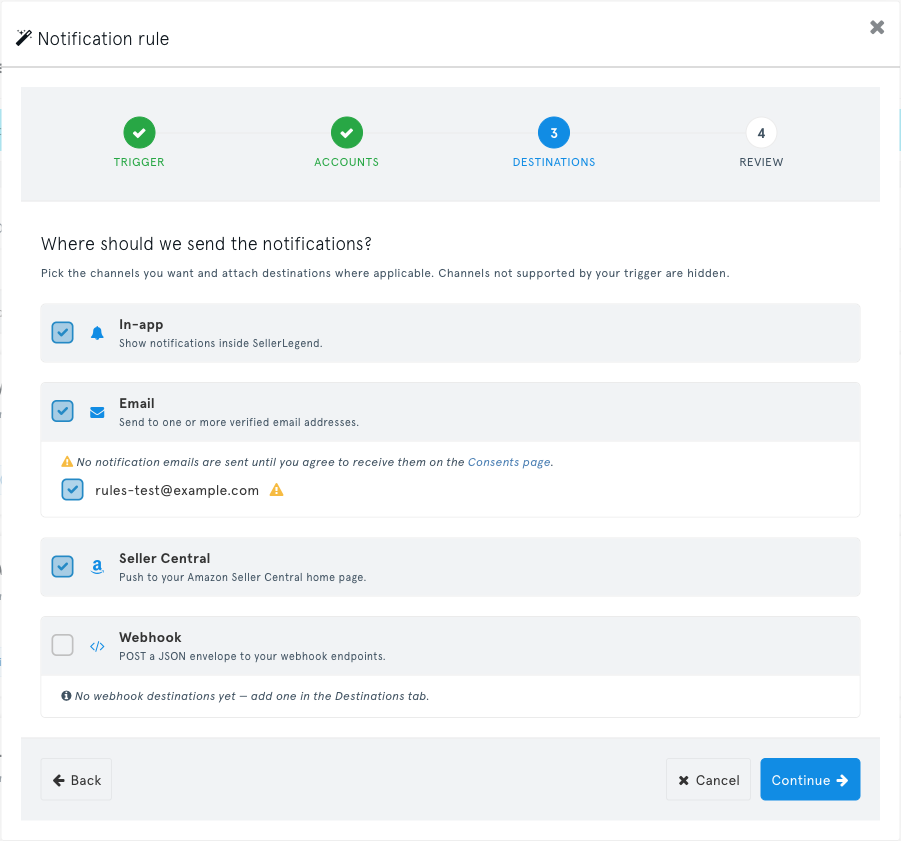
Destinations -- tick the channels to use and pick the email addresses or webhook endpoints to send to. Channels the trigger can't use are hidden.
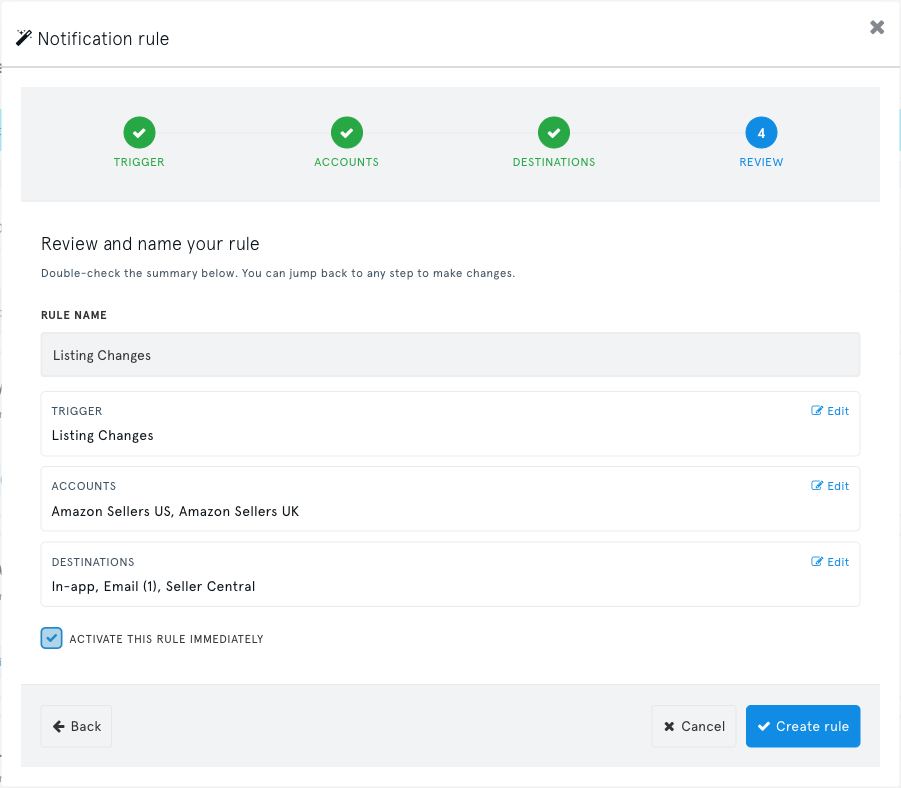
Review -- check the summary, name the rule, and click Create rule. You can choose whether the rule starts active straight away.
One rule per trigger per account
An account can be covered by only one rule for a given trigger, so the same alert is never delivered twice. If you pick an account that another rule already covers for that trigger, the wizard names the other rule so you can edit that one instead.
When you edit a rule, accounts that are currently disconnected or inactive stay on the rule even though the wizard doesn't list them. So does a Zapier channel that isn't currently available to you. The wizard tells you when that's the case.
Triggers
Per-account triggers:
| Trigger | Alerts you when... |
|---|---|
| Loss Of Buybox | you lose the Buy Box on a listing |
| Listing Changes | a listing's details change, such as the title, images or bullet points |
| Suppressed Listings | a listing is suppressed |
| Inventory Alerts (on days) / (on units) | stock is running low, based on your inventory alert thresholds |
| Back In Stock Alerts | an out-of-stock product is available again |
| Restock Suggestions | new restock suggestions are ready |
| Excessive Order Quantity | an order reaches the excessive quantity you set for a product |
| Returns | a customer return comes in |
| Feedback Notification | you receive seller feedback |
| Orders by Watchlisted Customers | a customer on your watchlist places an order |
| Download Charge Invoices | a SellerLegend charge invoice is ready to download |
Account-wide triggers are Import Report, Export Report, Export Report Failure and Amazon Connections Failure.
The Destinations Tab
Set up destinations once, then pick them in any rule. Each destination shows how many rules use it.
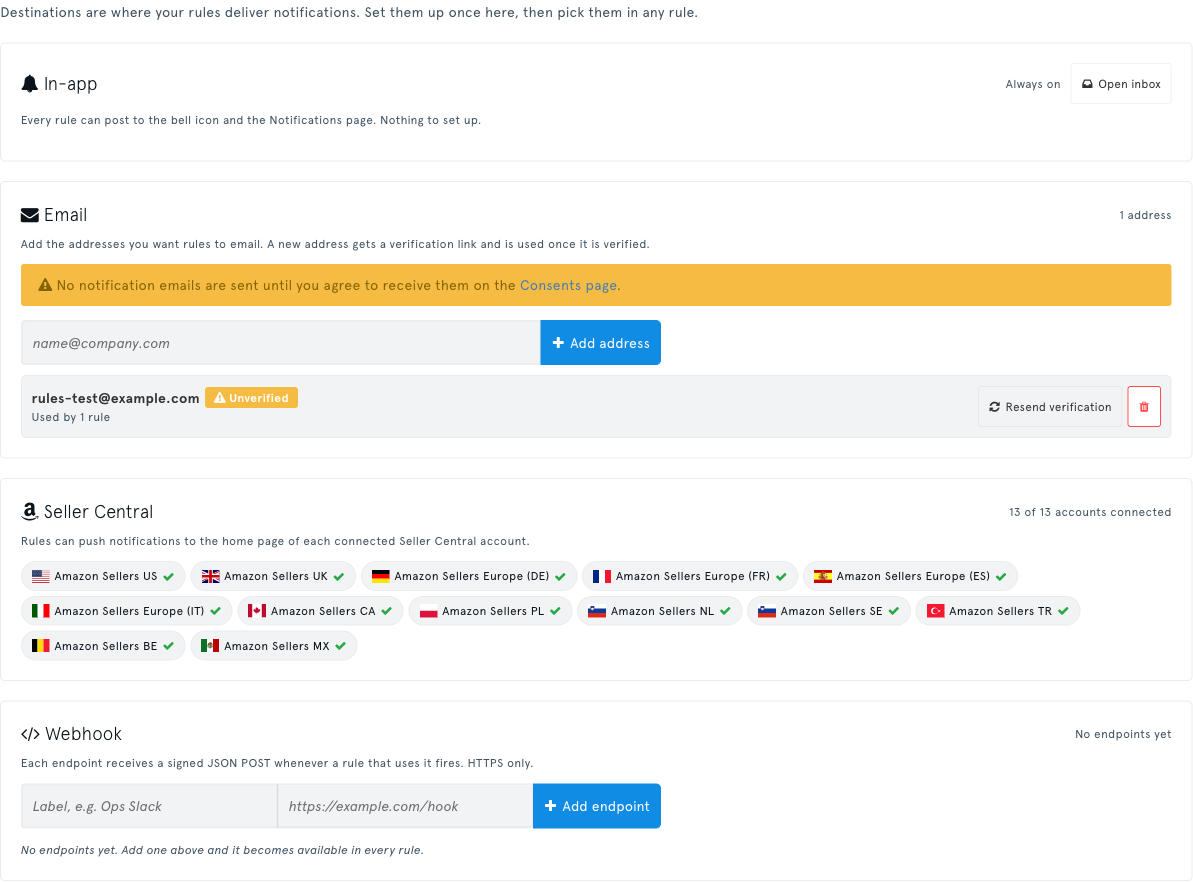
| Destination | Description |
|---|---|
| In-app | Alerts appear under the bell icon and on the Notifications page. Always available; nothing to set up. |
| Alerts are emailed to the addresses you add here. A new address receives a verification link and gets alerts only once it is verified. You can resend the link or remove an address. If you haven't yet agreed to receive notification emails, a warning here (and in the wizard's Email step) links to the Consents page. | |
| Seller Central | Alerts are posted to the home page of each connected Seller Central account. Available for Listing Changes, Suppressed Listings, Returns and Feedback Notification. Accounts that need reconnecting are flagged with a Reconnect link. |
| Zapier | Alerts are sent to your connected Zap. Shown only when Zapier is enabled for your account. |
| Webhook | Alerts are sent to your own system as a signed request. Add an endpoint with a label and an https:// address, copy its signing secret (shown once), and rotate the secret, re-enable an auto-disabled endpoint or delete it here. Developer details are in Webhook Notifications. |
Removing an email address or webhook endpoint doesn't delete the rules that use it. Those rules keep running and stop sending to that destination.
Default Seller Central Alerts
SellerLegend posts Listing Changes, Suppressed Listings, Returns and Feedback Notification alerts to your Seller Central home page by default. When one of these alerts fires for an account you haven't set up, SellerLegend adds the account to a rule for that trigger, so the default appears on the Rules tab. Pause or delete the rule if you don't want these alerts. A deleted rule stays deleted: the default is not recreated.
Key Points
- Email alerts are sent only after you have given consent on the Consents page, and only to verified addresses.
- In-app alerts appear under the bell icon in the top navigation bar.
- Paused rules keep their settings but send nothing until you resume them.
- Review your rules from time to time so you only receive the alerts that matter to your business.