How To Get Here?
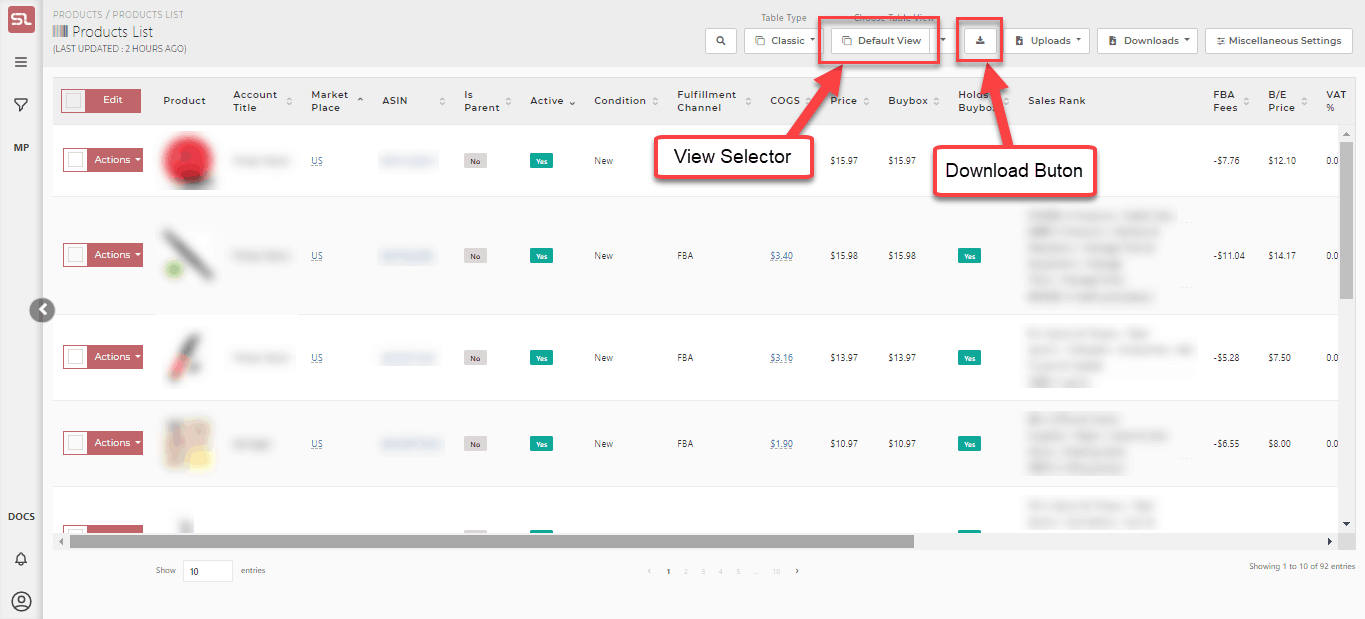
- Click on any screen and you can see a Download button from which the report is available for download.
- Every table screen (like, for example, Orders, Products List, Customers List) has a Download button.
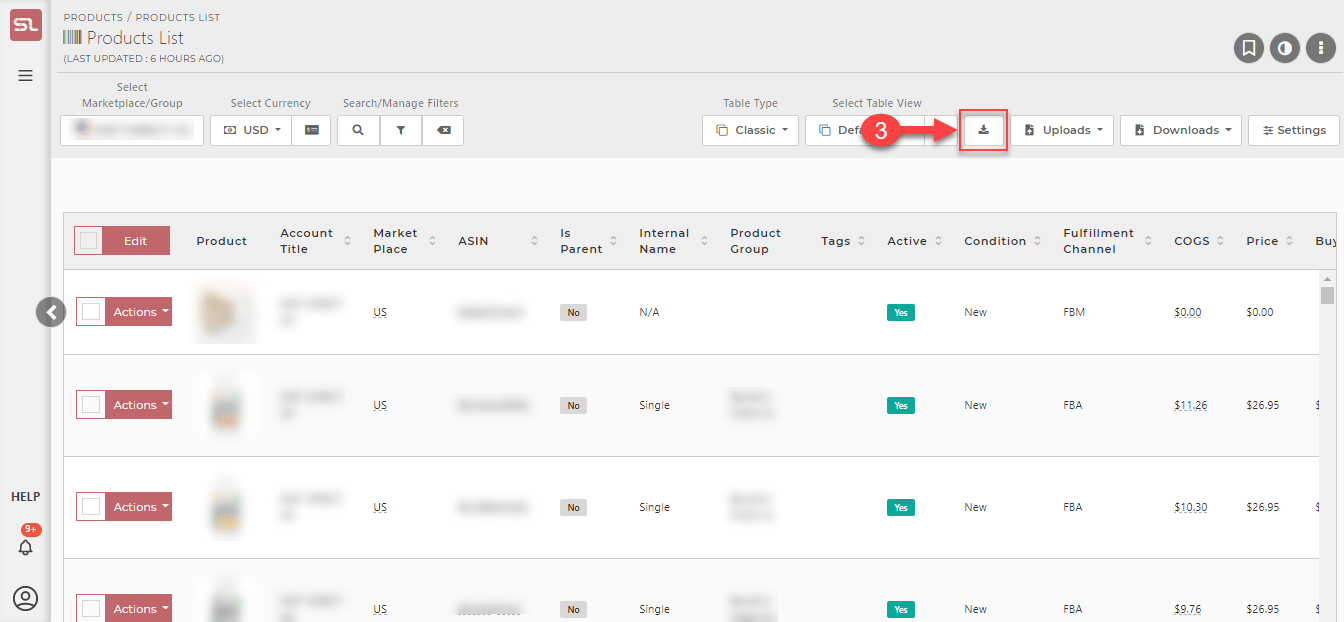
- Clicking on the Download button as shown in the screenshot below will queue the download for processing under Exported Reports
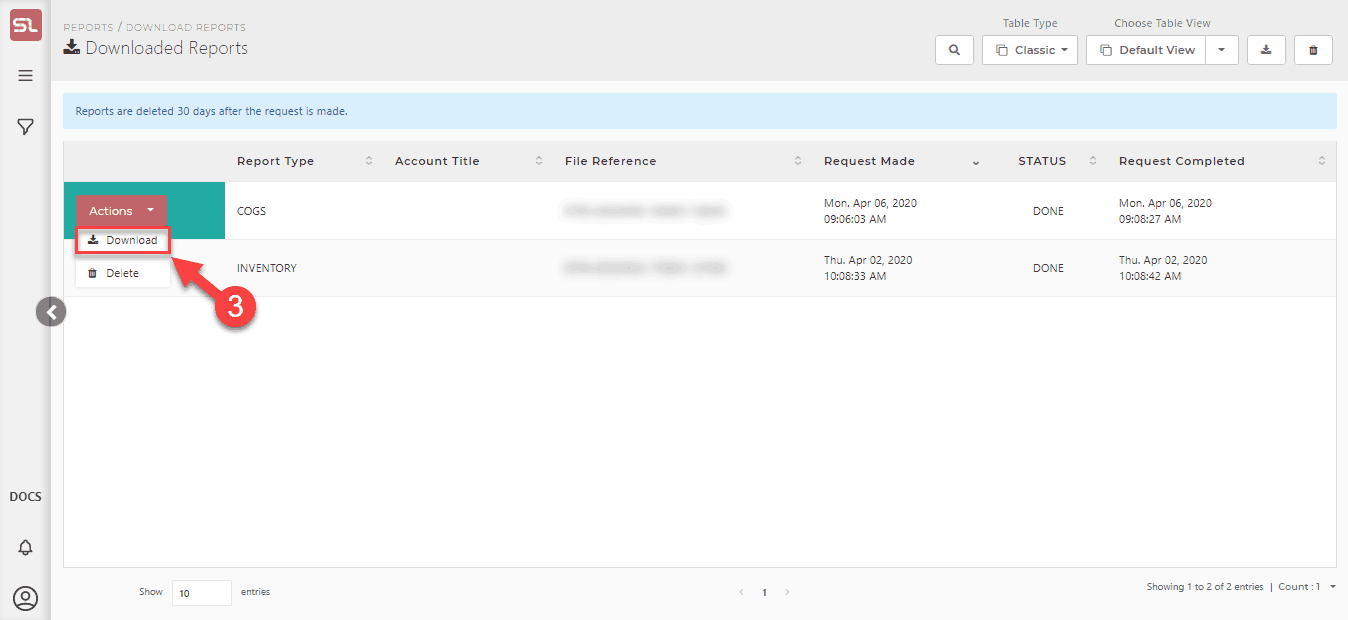
- Go to Reports–>Exported Reports to download the reports with the status DONE.
What is it for?
- To download the contents of any table screen directly onto an Excel spreadsheet and then analyze/ edit it. This helps in saving time when you have to deal with a bulk amount of data.
- Please note that the exported reports will have the data you have on the web screen i-e the filters applied and the view you are using.
- Sometimes users may not get the desired columns so they have to change the view to All Fields from the View Selector to get all the desired results
- This provides flexibility in handling reports. For example, some users want specific columns for their own convenience. They can download the report and make changes as they require.
- Sharing report with an accountant or a business partner or a VA but you don’t want to give them access to your account.
- People using software such as QuickBooks can download these reports and re-format them in excel/sheets and then integrate them with their application for further use or processing.
Here is an example of the Product List screen. You can see there is a download button from which reports can be exported and the View Selector button from which the required fields can be selected.
How to Generate Reports?
Follow these instructions to download the Product list:
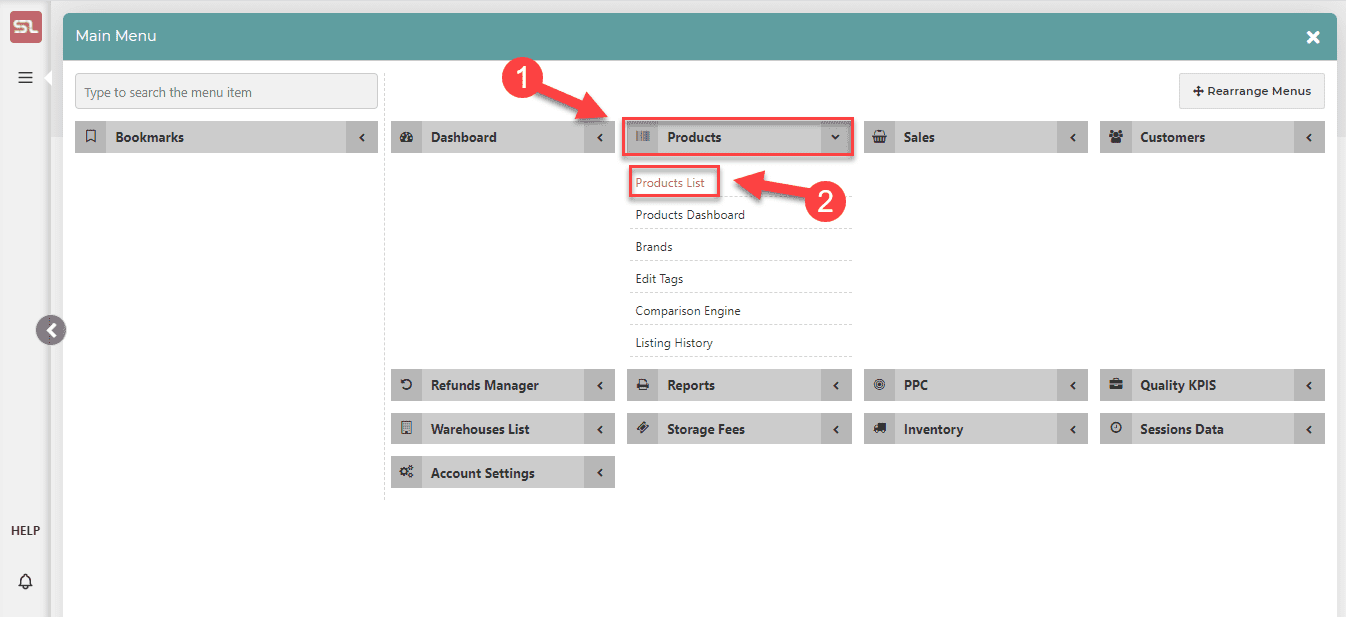
- Step 1: Click on Product
- Step 2: Click on the Product list
- Step 3: Click on Download Button
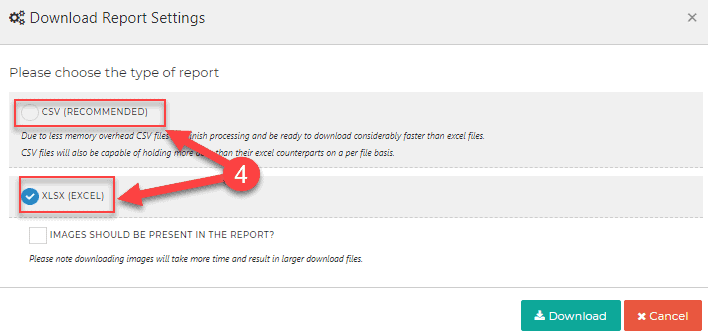
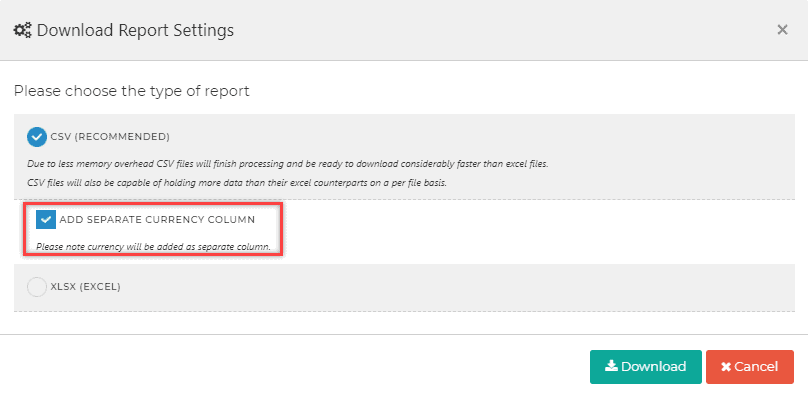
- Step 4: A Pop-up will appear to choose the format of the download. You can choose between CSV and XLSX format.
-
- CSV
- This is the recommended format.
- Due to less memory overhead, CSV files will finish processing and will be ready to download considerably faster than XLXS (Excel) files.
- CSV files will also be capable of holding more data than their XLXS (Excel) counterparts on a per-file basis.
- You will be able to add a separate currency column by checking the ADD SEPARATE CURRENCY COLUMN checkbox.
- CSV
-
- XLXS (Excel)
- Slightly slower than CSV files.
- Not recommended for larger data sets.
- Please note that downloading images will take considerably more time and will result in larger download files.
- You will now have the option to include/exclude the images in the report when downloading the report in XLSX format.
- Disabling Images will make the report downloading process faster.
- XLXS (Excel)
- Step 5: Another pop-up will appear saying that your request has been submitted, Click on reports link on the pop-up OR go to Reports -> Exported reports page. The Exported Reports page will show you all the reports you have requested for download.

How to Download the Generated Reports?
- Step 1: Click on Reports
- Step 2: Click on Exported Reports
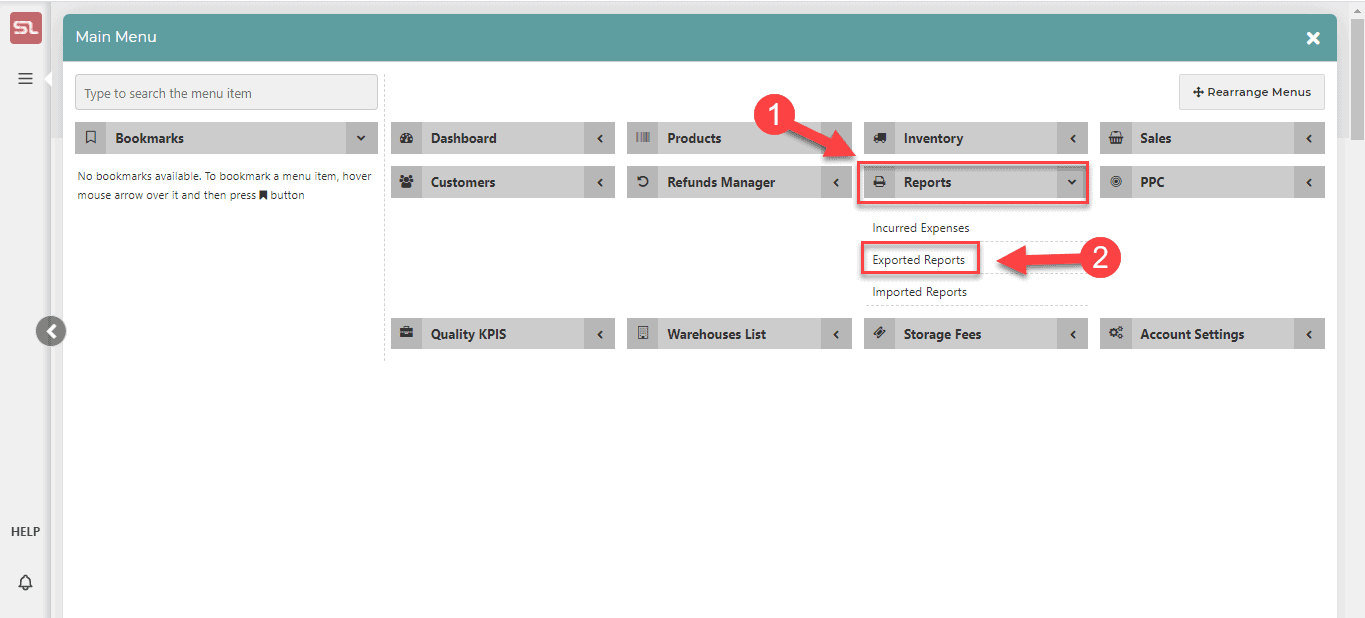
- Step 3: Click on Action to download the Product list report once its status is as DONE. Please be advised that Download time is dependent on the server load time.
How to Cancel Reports?
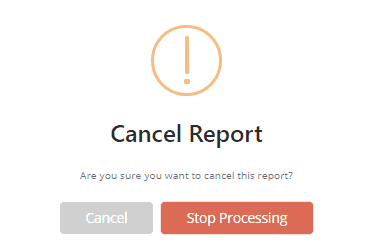
- If you initiated a wrong report to download, or you want another report to be exported first. You can now cancel the initiated report without contacting support.
- Please do note that a report can only be canceled if the status is Working or Queued.
- Go to Reports-> Exported Reports
- Navigate to the report you wish to cancel.
- Click on Action.
- Choose Cancel from the drop-down menu.
- A pop-up window will show up. Click on Stop Processing.

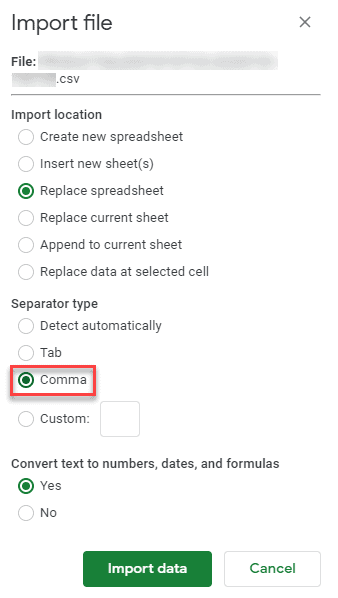
How to Convert CSV in Google Sheets?
- Open Google Sheets.
- Click on File>Import>Upload.
- Select the CSV file from your device.
- A pop-up window will open, from the Separator type choose Comma.
- Click on Import Data
How to Convert CSV in Excel?
- Open a new Excel document.
- Navigate to the Data tab.
- Click on “From Text”.
- Navigate the CSV file you wish to open.
- Click Import.
- A pop-up window will open, choose Delimited, and click next.
- From the Delimiters options choose Comma.
- Click next.
- Click Finish

