SellerLegend’s User Interface has gone through an overhaul and is now redesigned in a way that it’s become more intuitive, simple and usable, and less cluttered.
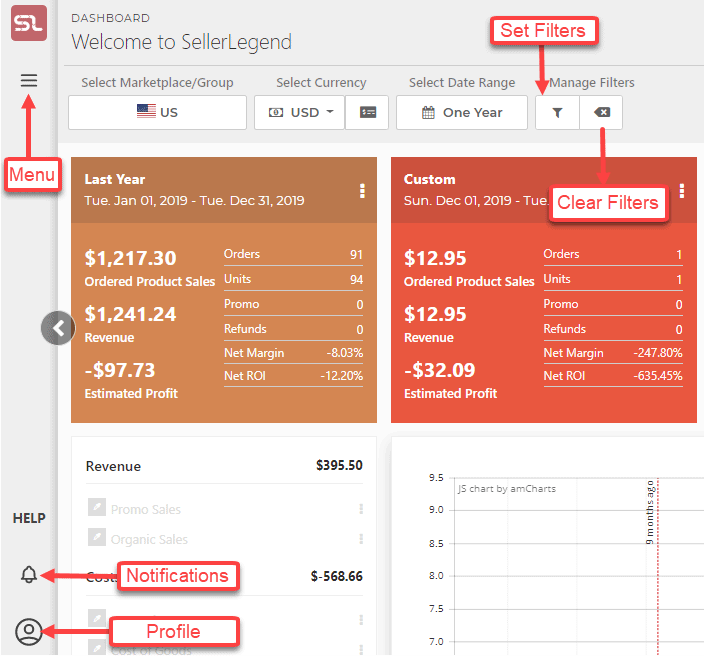
To maximize free space, the side menu has been replaced with a side-bar that can be completely hidden.
Main Menu, Help, Notifications, and Profile buttons are located in the new sidebar on the left.
Hovering over the icons shows what each button is.
Labels have been added to the buttons on the top to make it easier to identify them.
The screen below shows each icon with a label.
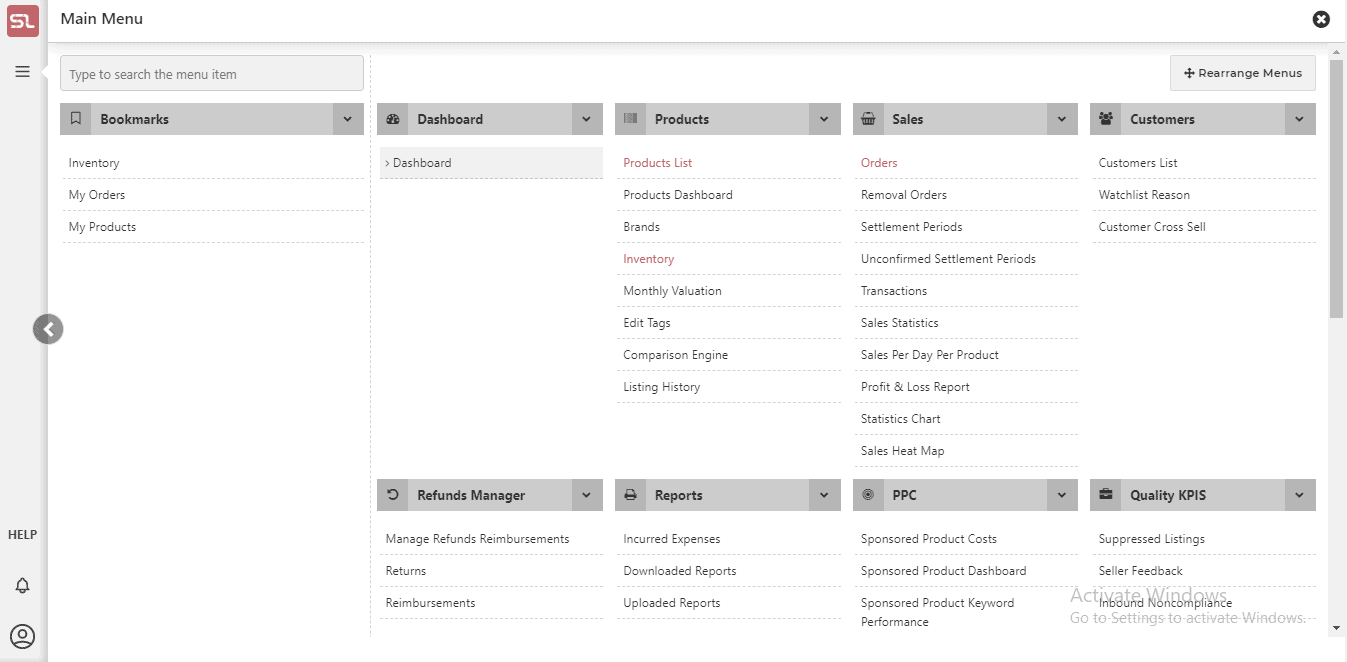
Main Menu
Click on the hamburger icon just below the red SL logo to see the entire menu.
The menu lets you see all the screens inside each category at a glance.
If you’re having trouble finding the screen in the menu, use the search box to filter it out.
You can also choose to bookmark screens that you use the most. This can be convenient as they will instantly catch your eye as soon as you click on the menu button..
The previous sliding menu has been replaced by a button in order to leave room on the sidebar for features that were at the top of every screen.
Seeing the complete menu, as opposed to only seeing categories and having to find your desired screen by opening each one, improves usability and saves time.
The side-bar can also be completely hidden. This can come in handy for tabular screens where you can zoom out to see more data without having to scroll a lot.
TIP: Clicking on the “Rearrange Menus” button turns on drag-and-drop, and you can move menu categories around with it.
TIP: Clicking on the drop-down arrow located to the right of any category header collapses/expands it.
TIP: Pressing the CTRL key twice brings up the main menu.
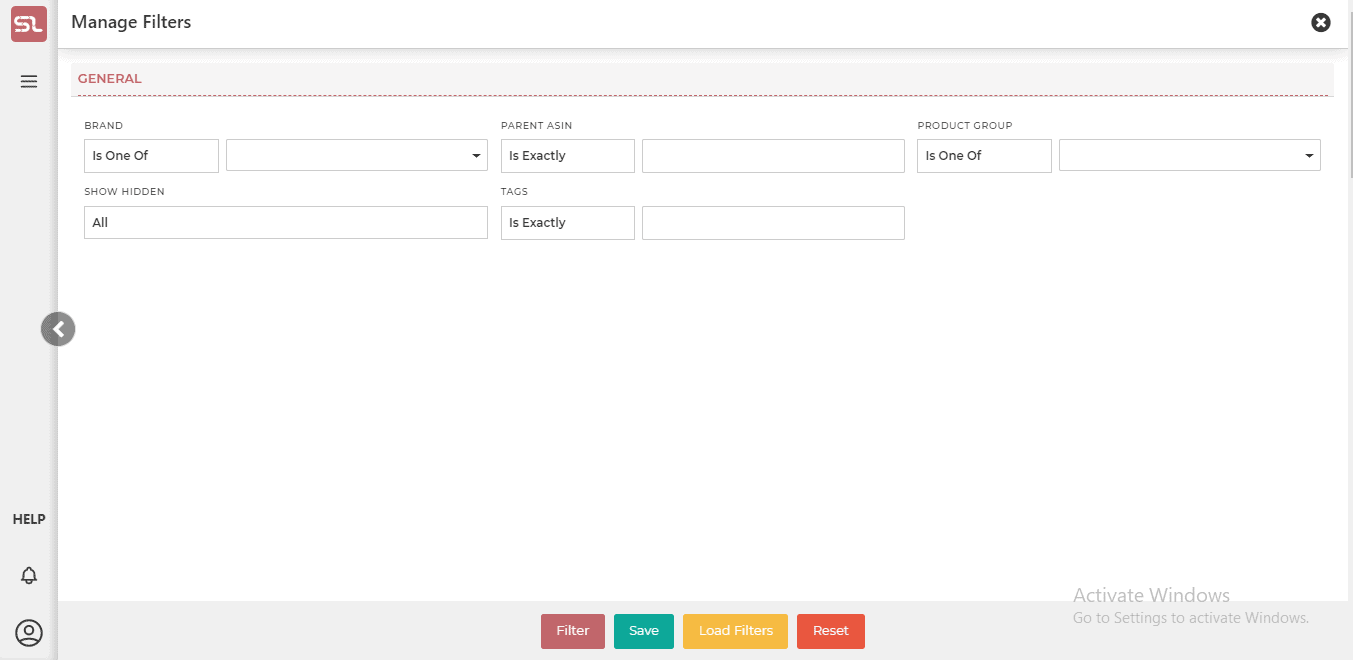
Filters
The filters button (funnel icon) is under the Manage Filters label, on the left.
Clicking on it shows you all the filters in one place.
Note that you cannot scroll the screen while using the filters. This improves speed and makes the UI more responsive and quick.
Click on Filter to filter, Save to save the filter for later use, Load Filters to use saved filters, and Reset to remove all applied filters.
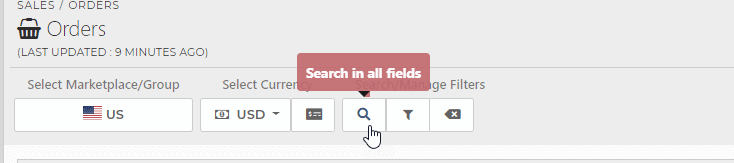
Omni-Search Box
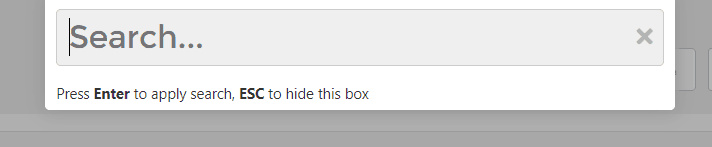
Tabular screens have the Search box available that searches in all of the columns in the table for the entered value. It’s now available on the left of the filters button, under Search/Manager Filters label.
Clicking the Search icon brings up the omni-search box. (Pressing / does it as well.)
The omni-search box filters for the search term for ALL the columns on the screen. That is, it shows only the rows where the search term matches any one of the column values.
Previously, the search box would immediately apply the search term as soon as the user had typed it in and there was no need to press enter.
How it functions now:
Pressing Enter applies the search term and closes the box.
Pressing Esc key discards the search and closes the search box.
Clicking anywhere else on the screen applies the search term and closes the box, same as pressing Enter.
Clicking on x at the right side of the box removes the search term. It does not close the search box.
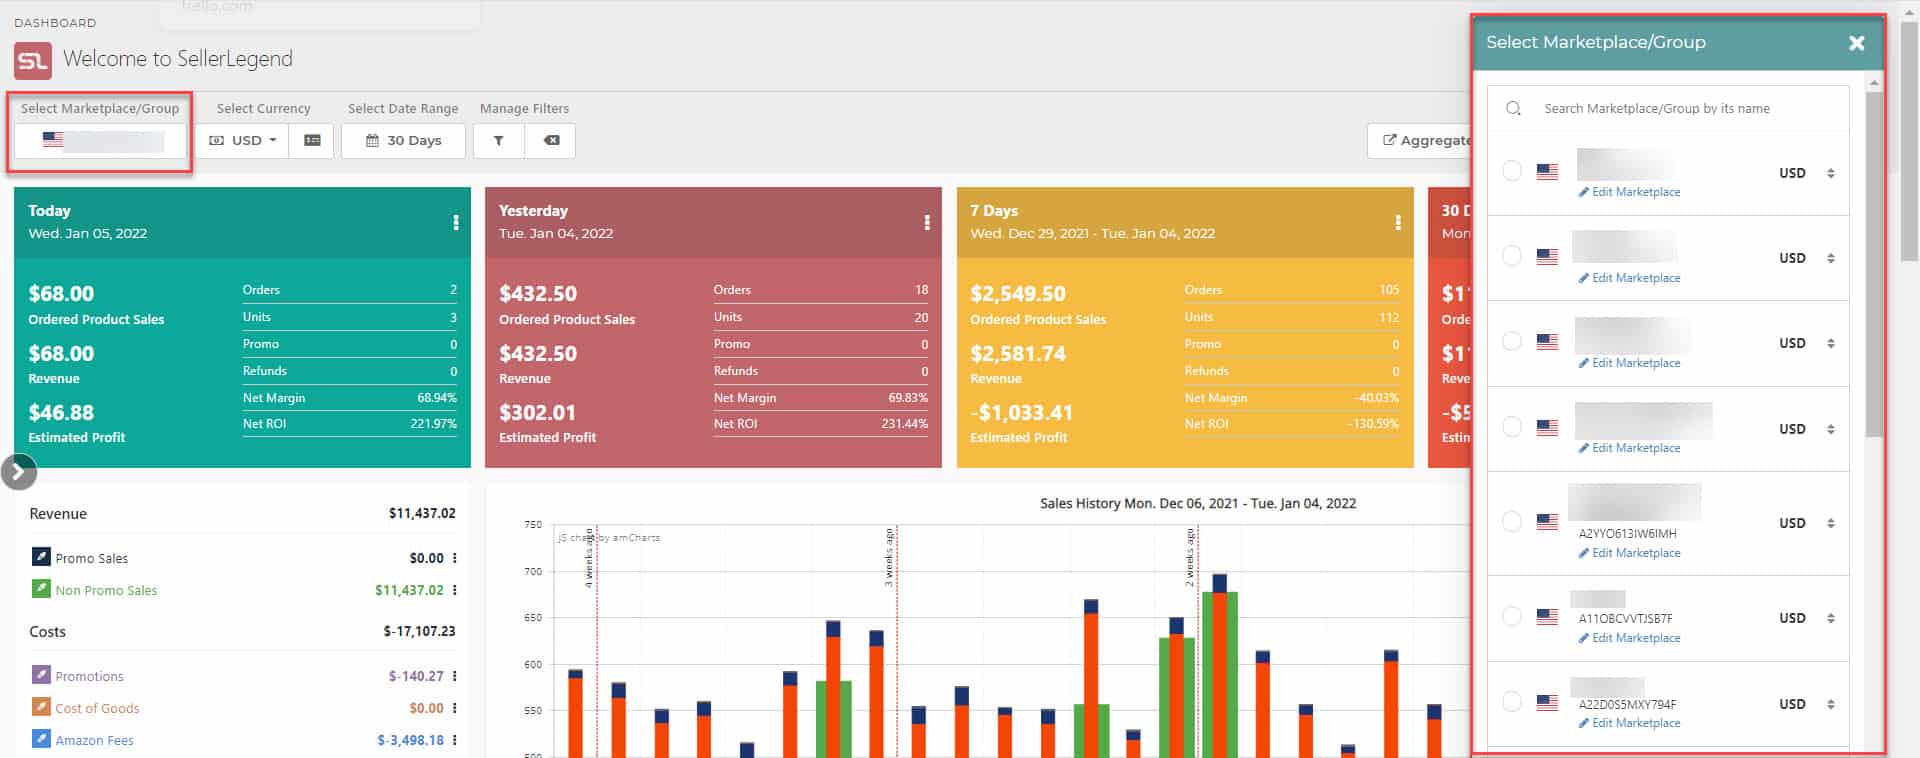
Marketplace Selector
Click on it, and you will see the list of marketplaces. You can use the search box if you have a large number of marketplaces to filter through.
To make things more convenient, the options to create account groups and add new marketplaces are now included in the marketplace selector.
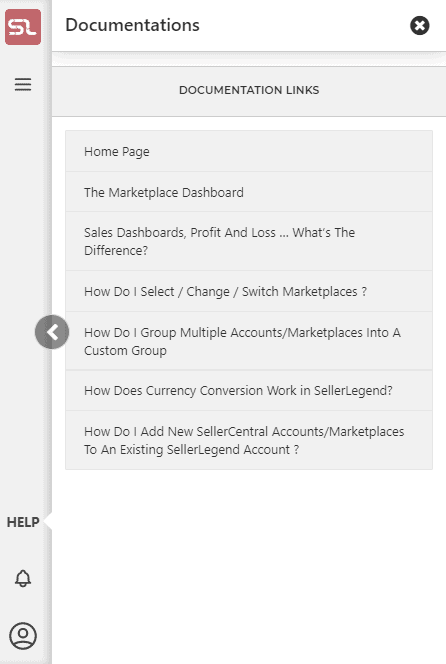
Documentations
This is the help panel. It lets you see links to relevant articles in our Knowledge Base.
The links are specific to the screen you’re viewing.
Simply click on one of the titles, and the link will open in a new tab.
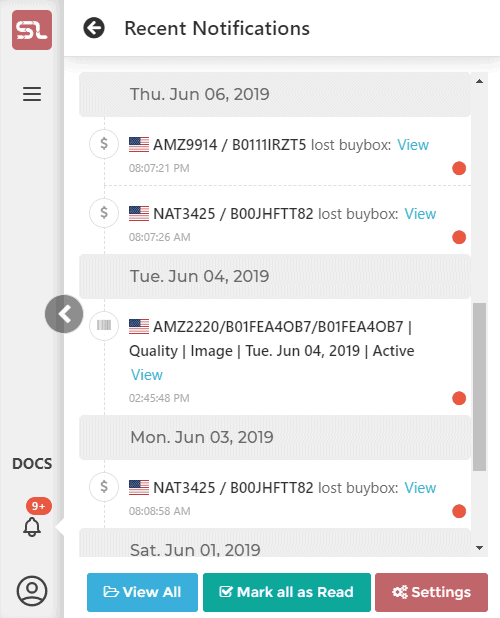
Notifications
Clicking on the Bell icon shows all recent notifications.
The panel shows you the most recent notifications. The red circle is for Unread notifications, whereas once read the circle turns green.
You have the option to mark all as read.
You can also click on the Settings button to go directly to the Notifications screen where you can manage them.
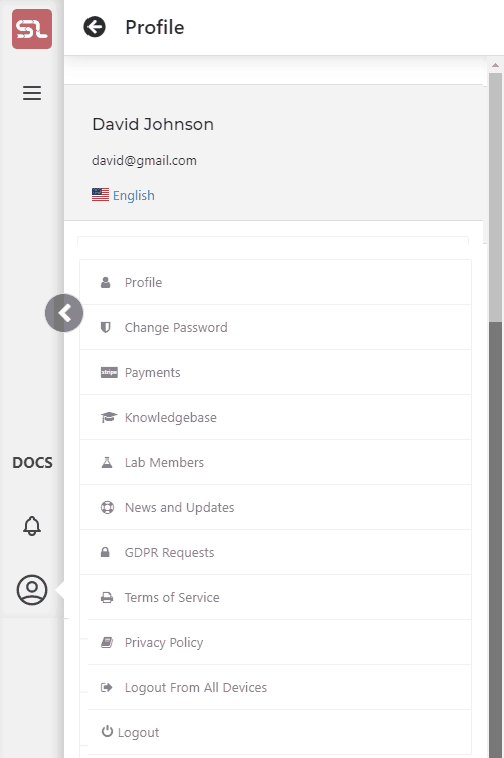
Profile
The profile button shows you additional personal information.
You can see your profile by clicking on the Profile button inside the panel.
You can also see your payments and subscription information by clicking on Payments.
Dark Theme
Users can now toggle between Dark/Light theme by clicking on the following button:
Shortcuts
Several shortcuts are now available for user’s convenience.
Double-press CTRL: Brings up the main menu.
Use Up and Down arrow keys to navigate in order, and press enter to go to the highlighted (with blue) screen.
Single-Press
” / “: Brings up the omni-search box.
” ? “: opens filters
Text-Based Shortcuts: Type out any of the following terms outside of any text box to go to a specific screen