- This article describes how to create a supplier online through the user interface.
- There is a suppliers bulk upload function, which is described in this knowledge base article.
How To Get There
-
- From the Main Menu
- Supply Chain -> Suppliers List
- In the Suppliers List screen
- Click on the + Add New Supplier button at the top of the screen
- From the Main Menu

-
-
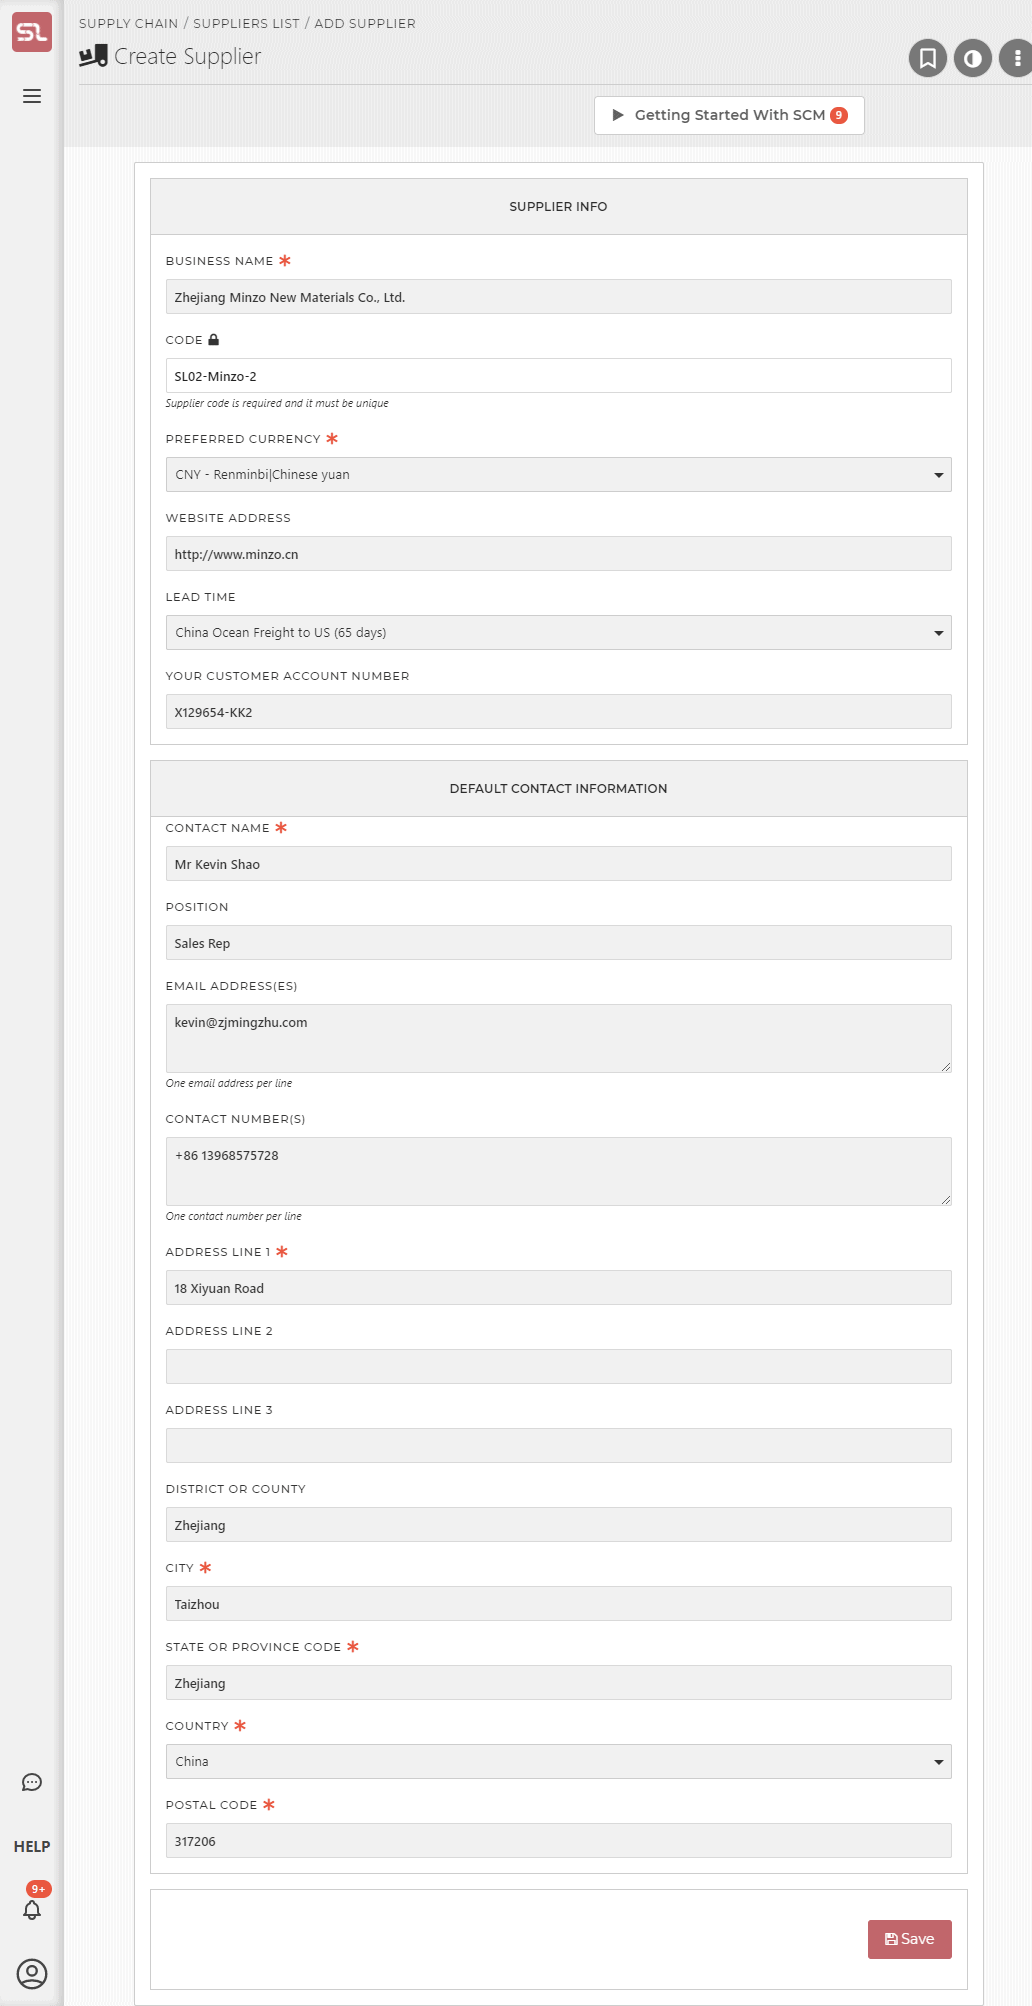
- A Create Supplier form will appear (see screen print below) where you can enter the supplier’s details
- When the details have been entered, click on the Save button at the bottom of the popup entry form to persist the supplier
-
What Is It For?
- To enter supplier details so that
- Products can be assigned to the supplier
- Purchase Orders can be generated for that supplier
- Supplier details are available to produce a Purchase Order for that supplier
Hints and Tips
- It is advisable that you create your list of Lead Times details before creating Suppliers, as you will need to assign a supplier lead time from the list to create the Supplier. Please see the article about Creating Editing and Assigning Lead Times for details.
- While it is not mandatory, creating all your Suppliers before creating Suppliers Purchase Orders will simplify your workflow.
- A supplier bulk upload function is available to load supplier details from an Excel spreadsheet, please read the Bulk Uploading Supplier Details article
Screen Print
Screen Content
Business Name (Required)
- The business name of your supplier as you would like to see it on their Purchase Orders
Supplier Code (Optional)
- A short name or nickname for the supplier.
- This will be used in the supplier lists throughout the system instead of the Business Name, for ease of reference and to save screen real estate.
- Although the field is optional, we encourage you to assign a nickname/short name
- The Supplier Code format is not validated, it can have any structure you wish.
Preferred Currency (Required)
- Select a currency from the currency dropdown. This is used to qualify financial amounts on the purchase order.
Website Address (Optional)
- The URL of the supplier’s website. Not validated for format.
Lead Time (Optional)
- Choose a lead time from the dropdown list.
Your Customer Account Number (Optional)
- The Customer Reference Number of your account with the supplier. Will be shown on supplier POs.
Contact Name (Required)
- Name of a principal in the supplier’s company
Position (Optional)
- The position in the supplier’s company for the contact named above
Email Addresses (Optional)
- Not validated for format if entered
Contact Numbers (Optional)
- Supplier telephone numbers
- Not validated for format if entered
Address Line 1 (Required)
- While a value is required, its format is not validated, so please use N/A or similar if you deem recording of addresses is not necessary.
Address Line 2 (Optional)
- Self-explanatory
Address Line 3 (Optional)
- Self-explanatory
District Or County (Optional)
- Self-explanatory
City (Required)
- While a value is required, its format is not validated, so please use N/A or similar if you deem recording of City is not necessary.
State Or Province Code (Required)
- While a value is required, its format is not validated, so please use N/A or similar if you deem recording of State/Province is not necessary.
Country (Required)
- Select a value from the country drop-down list
Postal Code (Required)
- Not validated for format
.